Tailoring Your StudioJuly 19, 2025 Think about making your studio just as personal and unique as you do your clothing. There's a number of things to think about here that apply to all workplaces, but after that, you
can play around with your space till it suits your style and whims! It's supposed to work for you after all.
Earlier this week I had a friend who's home had been lost in a fire. This was in the eastern part of our county and it's hilly, beautiful and forested in that part of the county, but when the "wind comes coming sweeping down the plain," and the ground is so dry from no rain, it can literally be like a tinder box, and they had five minutes to collect their
belongings and leave. I cannot even imagine losing everything in my studio, much less everything in my home. She was able to grab some important photos, but lost everything else. They are rebuilding, but without pictures of her former studio, she's trying to recall this by memory. So she came over so we could jar her memory about ribbons, interfacing, silks, wools, cottons, linens and all sorts of fabric, her machines, her iron and a whole mess of other things that we use
to sew that you can't possibly remember.
So the first thing I did after she left was photograph and video my studio and stash. The second thing we did was talk about how to arrange and design her new studio. So that got me to thinking that we haven't talked about studio design in a while, and it's something that's vital to our creative nature - how we sit in our creative space.
The first thing is to set about thinking about the zones. These are the
various tasks that you will do in your studio: - Cutting, drafting, drawing, and copying your patterns
- Sewing, serging, and assembling your garments
- Ironing your garments
- Workspace that you might need to draw or a desk to work with
- Supplies storage - everything from stay tape, zippers, ribbons to elastic to velcro
- Any additional equipment, serger, embroidery machine (if it's different than your regular machine)
- Guest sitting if you need
it
- Client sitting if you need it
Now your list will be different most likely, so make this list to what your tasks are; this is only an example. Once you have your zones figured out, you need to set them in priority. This is an example of how that would look - this is my priority,
but yours will probably be different. It's important that you arrange this to what YOUR NEEDS are, not mine!
- Writing and drawing space AND Sewing space (actually there is a tie between 1 & 2 for me)
- Ironing space
- Cutting & drafting space
- Client space
- Client seating
- Supply storage
So now I get to set about arranging my studio just the way I want. There's
some quick suggestions, because too often I see studios that are all lined up against the wall, when the middle of the room is not really used, plus, who wants to look at a wall with your back to the majority of the room? Think about it: you look in at a wall, and have no idea what's happening in the rest of the room. Let's look at some experts and what they do arranging workspaces.
This is Gekko's (from the movie Wall Street) private office in his New York apartment - look closely and you can see that his desk is in a position in which he can look out throughout the room. The entry to this room is on the right out of the side
of the photo. He can see instantly if someone is in the doorway, and who's coming into the room or even passing by in the hallway. He can see everything.
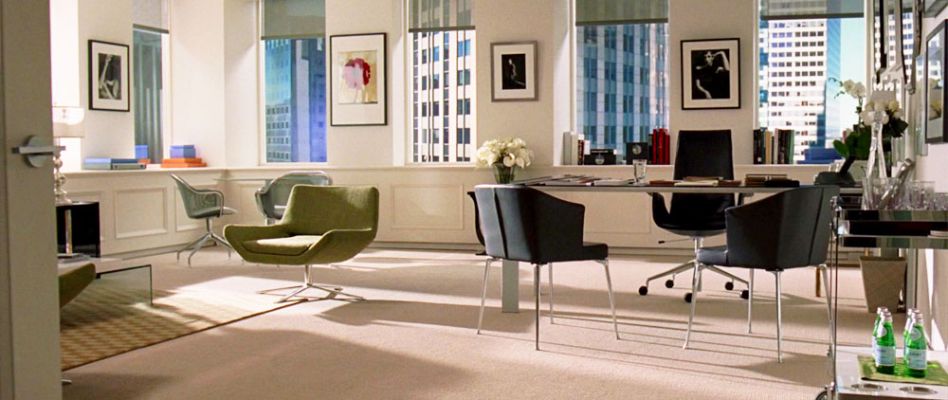
This is the office of Miranda Priestly in The Devil Wears Prada movie...her chair and desk are the furthest away from the door to the room. This is the classic commander position used in this room.
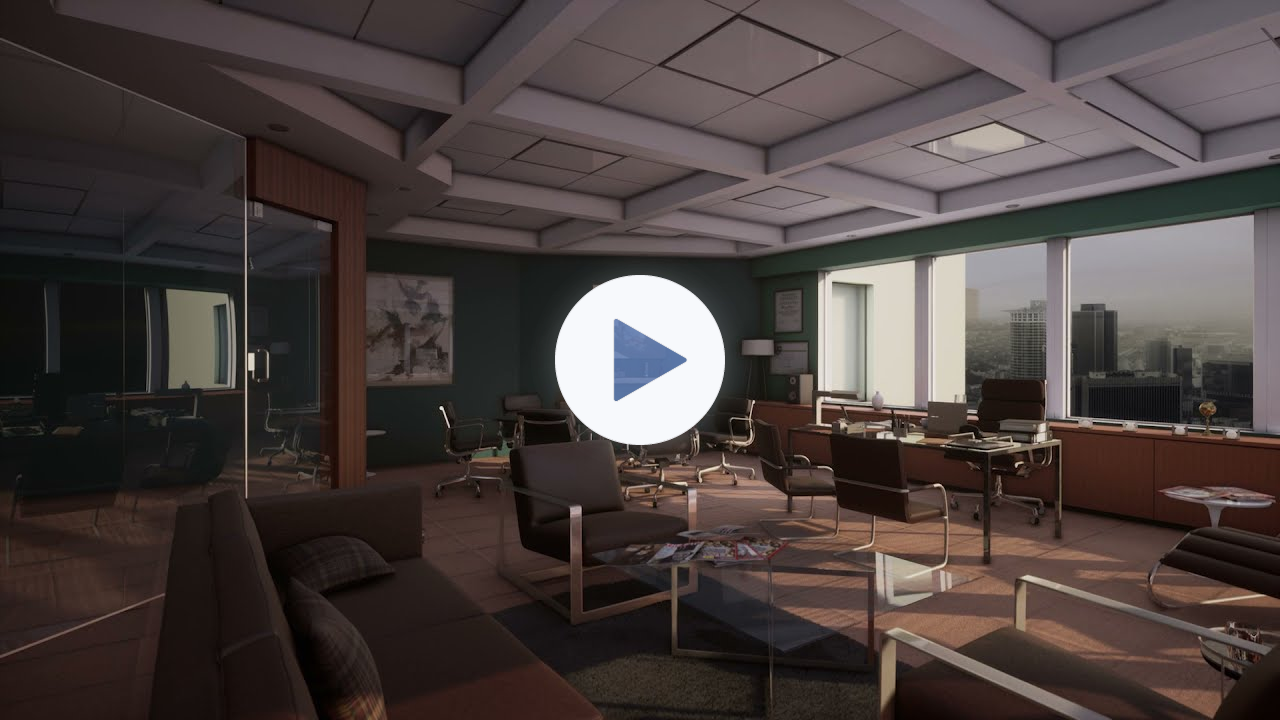
This is an interesting CG (computer generated) look at Harvey Specter's office in the TV series, Suits. Notice that more than any other part of the office, not only can Harvey see every part of the room, but he can literally command the room from his desk.
The desk is exact opposite of the entry door.
This is "M's" office in the 007 movies...the camera is at the door entrance, with the desk and M's chair directly opposite, so the M can see everything that's going on in the room.
Here's a classic example from the series, Mad Men, of entering a room with the commander position directly across from the entrance.
Let's look at some historical offices.
Here's a classic example of commander's position in an historical setting. This is the Throne Room of Buckingham Palace, and the throne(s) are exact opposite position of the door into the room.
This is Queen Maxima's of Netherlands home office - the entrance to the room is off to the right, so that the queen can see instantly who's entering the room.
The clear indication is that having one's major position (the commander position) in the
room is at the opposite of the entry door into the room. AND from that position the "commander" can see everything that's going on in the room.
So that rooms like these:
With your view of the wall, and again
with your back to the bulk of the room, it feels downright naked in that all sorts of mayhem or creative genius has gone unseen because you're facing a blank wall.
Here's more on the commander position and seeing how it can be used. Don't be afraid to push the short end of a desk or work station against the wall with the majority of the desk coming out into the room.
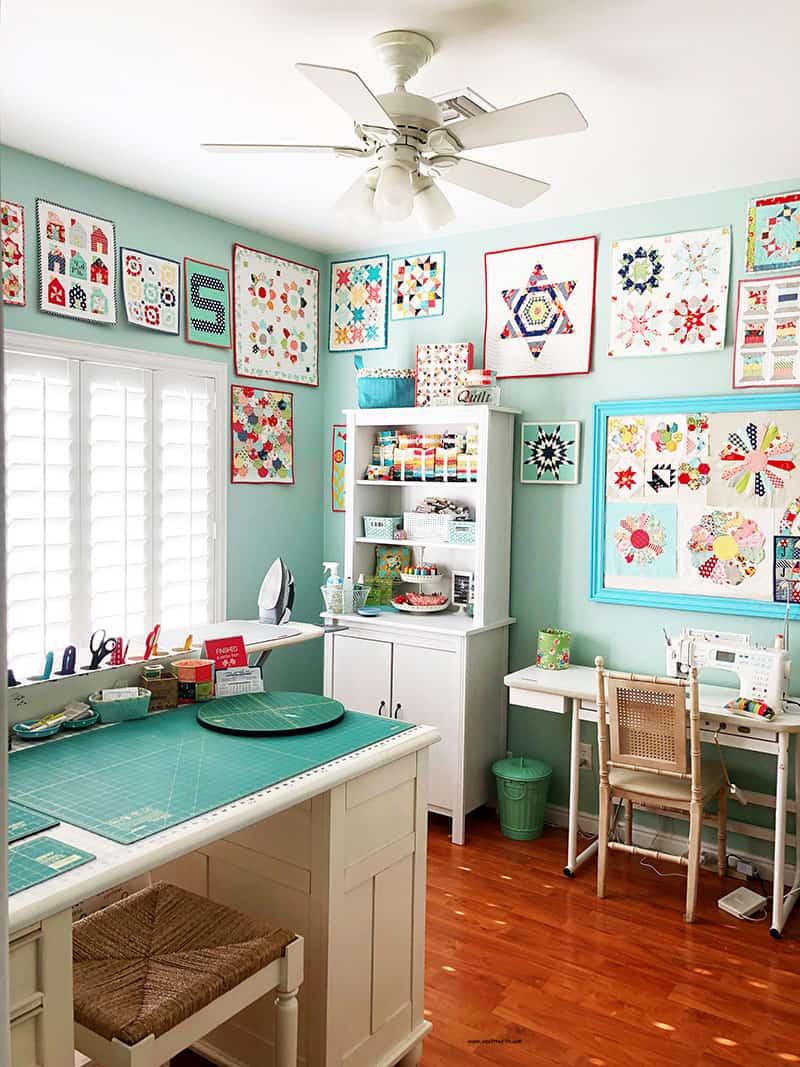
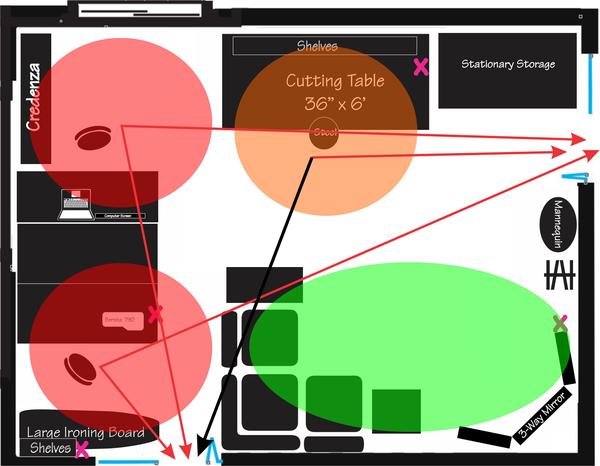
My main area is split in two - so between my desk w/computer and my machine, I had to split them so that they would both share the commander position. You may think that because the door behind the sewing machine is going against the commander position, but
the chair at the sewing machine actually sits against the wall which helps keep the position from being "blind." Additionally that door leads to the hallway and across the hallway is Walt's office which I love leaving open so that we can exchange ideas, questions, remarks (usually ornery sassy remarks from him)! The sewing position IS in the commander position when using the main entrance to the room.
The orange cutting area is next important area, so it's secondary to
the two primary commander position, and the client's area (green) is the third most important seating area. Storage is also located under and the shelves above in this orange area. Here's some more in-depth information about arranging a studio.
After living with this arrangement for almost ten years, I can
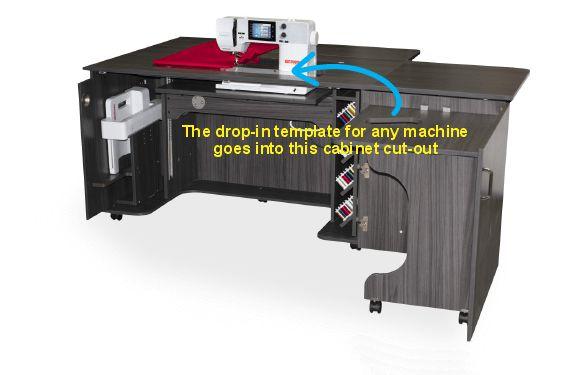
tell you that it's much more functional than my other arrangement in my old home. I will never have built-ins again, as once they are built in, you can never move them. Primarily the cut out for my old Bernina 1130, would have had to been totally recut to fit my current Bernina B790. Now if I want to upgrade, I simply have to change to another cabinet and machine and I'm in business again. Actually the cut out on the current
cabinet I have can accommodate just about any Bernina because all I have to do is get another cut out for the new machine.
Not only that but because this is on wheels and not built in, I can move it anywhere in my studio I want. I can take off some of the side components, or add more or different ones. The versatility can adapt to my needs, not what was
available 5, 10, 25 years ago!
Additionally, if I stop seeing clients, (honestly I can't imagine that would ever
happen), but if I do, I have a wonderful space if I want to switch it to a teaching studio. My current studio was designed to be the living room of our home, so it's the first room people walk into, which is how an home office or studio should be.
Not only do I feel comfortable and at ease in my studio, something I could never say about my other studio, I really want to be in it and work here. It's almost like I fall right into a sewing or thinking sewing zone when I
enter the room.
This is the key factor in setting up your sewing space - to make it a place where you can talk with your creative muses and create and think about creating wonderful things. The creative conversation you have with your muses is so delicate and ethereal, that it's worth every minute you spend cultivating, nurturing and providing a safe place for those creative juices to flow!
The SewingArtistry Resource Library is designed to contain information to not only make your sewing better, but to aid in you fitting and flattering your shape, size and style. Check it out.
Look for future classes coming in 2024
The Core Pattern Shirt, (one of my favorites for woven core pattern that you can make into a myriad of different
garments),
Basic Knit Top (core pattern class for knit basic tops, shells, tees, dresses, and tunics)
|
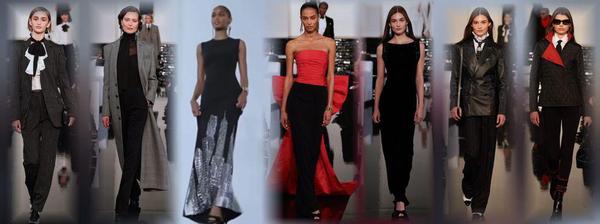
Tracking a fashion trend isn't all that hard after seeing a few of them.
Living from Mid-Century Modern through Twiggy...
It's worth the time to look at these styles, particularly today as
there is a group of that wants to look....
This is the way fashion used to be -- pretty, flattering and I can't wait to make some of...
NOTE: There are some folks who can't get my email, or it's sporadic, or something is hinky. I will always respond to any of you who send a private message, whether it's about the topic of the week or something else. If you don't get anything
from me, it's probably because the [email protected] email is blocked, and even a private message can't get through. In that case, I'm on Instagram often, and you can always PM me at @sewingartistry.
As a precaution,
please ensure I'm in your email Address Book and check your spam, junk, and trash folders. Some email clients get extra excited when they see emails coming into the Inbox that go to many other receivers. They automatically think it's trash or spam, and it never makes it to the Inbox. I must constantly check my spam and junk folders to ensure I'm getting the emails I subscribe to.
To view in browser along with past emails, click here. We respect your email privacy. |
|
|


.jpg)