|
To View in your browser, click here
March 3, 2023
When I was a kid and would look at my mother's cook books, there would always be a section called "Lagniappe." I asked what that was, and she would simple say, something extra. Later when I went to school in the South, I learned it's a Cajun/French expression for a bonus - a gift of sorts. I like that description better. So here are some bonuses - little things that don't quite make up a whole newsletter, but are
valuable just the same.
Adding Extra Fabric in Seams for Fitting
The easiest and best way to alter is actually to make the garment a little larger, particularly in areas that you know where you carry most of your weight.

Here's a perfect example from one of my Instagram tailor reels. But look at this shoulder. Not only is the shoulder extended waaaay to wide, but it's also way to big (from shoulder to waist). There's a specific reason for this, because the tailor can totally mess around with the width and largess of the shoulder to have it lay correctly.
Everything has been basted in so in a matter of seconds the seam can be ripped apart and altered on the client just the way the client wants.
So obviously, it's hard for us to reach around and check out our shoulders while the garment is on our bodies - unless we have a very good friend or a mannequin. But the real take-away here is that it's easier to make seams a little larger and bigger so that we can pinch out what we need for that fit, instead of having to 1.) take the seam apart, 2.) add extra fabric, and then 3.) guesstimate where to sew it up (usually to have to re-sew it a couple of times).
When the seam is larger, we not only can pinch it out and alter it easier, but that pinch out is much more accurate than if we have to take the seam apart and add fabric in.
I love these little goodies from tailors.
Adding Fabric Where You Need It Isn't Always A Side Seam
OK - so think about this for a minute. You have your bust area, and if you tried to fit that bust area, by adding more in your side seam and with no bust dart, how would that turn out? It would be incredibly bulky under the arm, and incredibly tight where you need it at your bust.
Here's how this works.

See all the darts in this skirt? They are there because there is bulk at her butt. There is a difference between the waist and the butt, which could have as much as 5", 6" or more difference. In this case, probably less than that, but she doesn't need one dart on each side, she needs two. This makes for the beautiful round silhouette of the back of the skirt, that is more indicative of the curve of the body than a simple curve at the hip on the side
seam.

So starting on the left is a typical skirt pattern with two darts. What happens when we take those darts out, so that the waist line is now correct and the hip line is correct, however there is no curve in the pattern. The pattern piece is flat. When you sew this up you will have excess bulk on the side seam (red circle) and not enough room where you need it at the fanny area (green circle).
This may sound like a simple, "Duh!" moment, but the truth is that this is something to consider while you are fitting. If you're fitting your shoulder, don't expect to put a dart in the armhole seam to fit your shoulder.
This is why when you rotate a dart, you rotate it around the point of that dart. Some of the more commony dart points are, bust point, hip point, stomach points, shoulder points, butt points, and there can be more. If you rotate the dart on the dart point, you will be fine.
Sketching Can Answer So Many Questions
I know this sounds too simple, but I wanted to show you what happens when you start sketching. I was chatting with a student about insets on the side of a garment - which I love, cause this calls for endless variations that can affect your figure in dramatically positive ways.
 So this is an apple shape, and we're got the inset, darker, on the outside and front pieces, lighter, on the inside, to give the illusion that this figure is thinner, and it does that well (lighter projects, thinner recedes). But we want to use a stripe on the outside,
so which direction is best? So this is an apple shape, and we're got the inset, darker, on the outside and front pieces, lighter, on the inside, to give the illusion that this figure is thinner, and it does that well (lighter projects, thinner recedes). But we want to use a stripe on the outside,
so which direction is best?
We have several options 1.) we can cut it out, 2.) sew it up, 3.) try it on, 4.)compare one direction, then 5.) take it apart, 6.) cut it the other direction, 7.) sew it up, and 8.) compare it to the first one...
or...
we can 1.) sketch it up!
Guess which one I like!
These are the many ways that sketching can solve so many problems even before you cut the fabric out. That way you know what's going to work and how to cut it out and how to trace off the piece to work.
Looking above at the two pictures, it's easy to tell which direction of the stripes work, but frankly I see another problem and would like to solve that too. Something I didn't think about when I was first working with this design but because I sketched it up, it was there right in front of my eyes - this is what sketching does. Apples always carry their weight mostly
at their waist and above, so their shoulders and upper chest are always a lot bulkier than the rest of their figure. Putting that light color on the sleeves, causes the shoulders to look even larger. What would happen if we did the contrast in the sleeves too? We don't have to make up the garment to see that option, we simply have to sketch it up.

Notice I've picked the line-direction winner of the above photo for comparison. Suddenly the shoulders don't become too large, they are fading away.
Now there's something else I know about Apples and that is I've never know an Apple shape that didn't want a waist, and in the inset in the body, I gave a little curve to give the illusion that there's a waist, where there is not. Notice how shapely she looks even though in the side seam profile, there is no waist.
It's all an illusion and it works really well. This technique also works well for Rectangles.
Not to worry cause I haven't left out Pears. And as any self-respecting Hourglass knows, they tend more toward the Pear shape than the Apple shape, so here's what works for Pear and Hourglass shapes.
 Again we're working on the direction of the stripe, and it's clear which one is the best one, and again we don't have to cut, sew, take out, re-cut, sew just to see which one works. The sketching can answer the question very
easily. Again we're working on the direction of the stripe, and it's clear which one is the best one, and again we don't have to cut, sew, take out, re-cut, sew just to see which one works. The sketching can answer the question very
easily.
So what happens when we do some more working with the seam lines of the inset, like we did for the Apple shape. Pears, carry their bulk below the waist, so that's what we need to mask more than the upper part of the body. So the sleeves are fine as they are, and the stripes are in the right direction so what else can we do.
 In the same way we did above to give the Apple a waist, we can take the inset and create a more V line (where it is slimmer at the bottom), to give a more svelte look for the Pear shape. So here there's a very slight inward angle at the hem to give a more V look, that
makes our Pear shape look more V shape. It's very slight, but it works really well. In the same way we did above to give the Apple a waist, we can take the inset and create a more V line (where it is slimmer at the bottom), to give a more svelte look for the Pear shape. So here there's a very slight inward angle at the hem to give a more V look, that
makes our Pear shape look more V shape. It's very slight, but it works really well.
Notice how the lines are different from the Apple/Rectangle to the Pear/Hourglass? This is the difference that the lines can make in the illusion. It's about how the lines cause your eye to travel.
All of these are simple techniques and sometimes I think that's the problem with them. They are too simple to actually solve these mind-boggling questions about which direction is best for a stripe, which fabric is better for the inset, or the center piece, how to recede shoulders, and project hips (yes, Apples need to project their hips) and what to project and what to recede? All of these can be answered in the sketch.
A Final word about the sketch.
This doesn't require that you be an artist. What this takes is tracing. You will need a croquis (crow-key' - it's French, what can I say!), of your own body. That's easy to do. Stand in front of a high contrast background with something skin tight or your own body in your underwear. Then print that out, and trace around the side of the silhouette. Then burn the photo and delete it
from your phone!!! And hold on to that outline. That's your croquis. Trace your ideas on that croquis, and you can tell by that if the shape and size and style is going to work on your body.
I love using Pacon Sulphite Drawing Paper, and the reason I'm so specific, is that this paper has excellent tooth - which means it grabs the medium (your pencil lead) and it's also fairly translucent - not transparent, but you can still see through it. It's an
excellent paper to use.
So get the idea that you must be an artist to do this out of your head. This is not drawing - it's tracing and there's a huge difference. One is relatively easy to do while the other takes a lot of practice, so don't make extra work for yourself - you're tracing and that's all you're doing when you make a sketch to check how the design will work.

The SewingArtistry Resource Library is designed to contain information to not only make your sewing better, but to aid you in fit and flattery of your shape, size and style. Check it out.
On the Blog
|
|
|
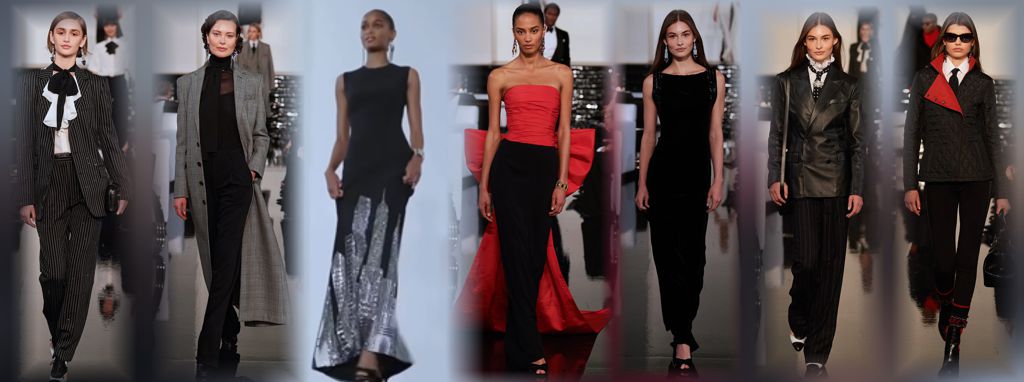
It's worth the time to look at these styles, particularly today as there is a group that wants to look...
|
|
|
|
This is the way fashion used to be - pretty, flattering and I can't wait to make some of ...
|
|
|
|
The other day I was doing the laundry and suddenly my machine wasn't spinning, thus wasn't washing. It was making...
|

To view in browser (so all images can be seen) or past emails or in your browser click here.
NOTE: Some email clients, software and web sites, do not allow pictures because they can contain nasty worms and viruses - ICK! So they will by default block you from seeing the pictures. This is a security measure from your email. I can't change that cause that means I would have to get inside your computer and mess with your security which you don't want! So you can do two things: 1.) you can disable your image blocker and that will
depend upon your software. You can Google it to see how to do that for your specific email. 2.) You can view it in your browser which is equipped to handle the nasties that might be in pictures. To do that you can click here to enjoy the full email with pictures!!
To talk about a sewing problem, a style quandary or size situation one on one with Claire, click here.
We respect your email privacy.
|
|
|
|