|
To View in your browser, click here
February 3, 2023
One of the comments I hear the most when doing fittings with students is: "Oh I didn't know I could do that!"
I have to wonder if some Wicked Witch of Sewing in the West has gotten the word out that only certain solutions work for certain problems and that there's only one solution and all other solutions are wrong, wrong, wrong❗
Yikes - talk about insecure teaching. One of the things I first learned on the computer is that there are a number of different ways to get to an effective conclusion. If I want to copy something, I can select with my mouse and click Cntrl+C, I can go to <Edit, Copy>, I can right click and select copy on the drop down menu and all of that will do the same thing. The more complicated the problem, the more solutions that are available to us.
Here's a perfect example.
 This is a sketch of wrinkles from the neck pointing to the middle of the armscye and underarm. This is a sketch of wrinkles from the neck pointing to the middle of the armscye and underarm.
So when you think about this, what this means is that the fabric is drooping from the shoulder at the neck and there's too much fabric on the armscye at the shoulder. How do I know this. Because I can pull up the shoulder seam at the outside (toward the armscye) and the wrinkles will disappear. I've done this before.
But here's the deal, there are a number of ways to solve this wrinkle problem. The problem is that there is too much fabric on the outside of the bodice armscye, so here are the solutions.
1. Put in a shoulder pad. This is particularly attractive if this wrinkle is in a jacket and the wrinkle isn't all that much.
2. Take up the shoulder seam slightly. But remember you have to drop the sleeve header seam down just a little to make more room. This is particularly effective for the shape that has a large arm and/or bicep.
When I do this for students, they always say, "I didn't know I could do that!" I'm not sure why, but that's a common comment I get.
Another comment I get is, "My top doesn't close in front, but if I add enough fabric for it to close, then it's too big across the shoulder!" Immediately this is the FBA.
Now this comes from messing around with the whole front area and working with figuring this out. How do you make the bust wider without making the shoulders wider? That's a real funky deal, cause you're looking at making everything from just under the bust larger, but above the bust smaller.

This looks like a real mess, and it only increases the bust by a little while really increasing the hip and waist area that doesn't need all that much more fabric.
 But then look at this...with this configuration you can see that suddenly, you're adding the majority of the fabric at the bust point, and at the waist and hip, but not so much at the waist and hip that you're having to make a huge dart. This is adding the fabric exactly where you need it and not
where you don't. I don't remember so much about learning from my mentor because I was so happy to have met her and learn from her, that I spent as much time as I could around her learning, that I was in such a joy mode all the time. I would come to her in class with this or that problem, and she would say, this or that on how to solve it. But then look at this...with this configuration you can see that suddenly, you're adding the majority of the fabric at the bust point, and at the waist and hip, but not so much at the waist and hip that you're having to make a huge dart. This is adding the fabric exactly where you need it and not
where you don't. I don't remember so much about learning from my mentor because I was so happy to have met her and learn from her, that I spent as much time as I could around her learning, that I was in such a joy mode all the time. I would come to her in class with this or that problem, and she would say, this or that on how to solve it.
Studying with her was a blast for me. We were totally of like kind and used to joke and laugh all the time about sewing stuff that only mattered to us. But I DO remember studying about the FBA, and I know I looked at her like - "I didn't know you could do this!" She looked at me confused and said, "Why not!" Turn about is fair play.
We are turning a two-dimensional shape (our patterns and pattern paper) into three-dimensional shape. For a lot that takes on a whole other set of probabilities that some can't comprehend. We dressmakers are that smart that we can turn something that is 2-D into 3-D and probably don't think too much about it.
In design school, students spend a whole year with flat-pattern design (the 2-D part) and then another year in draping (the 3-D part). The reality is as a dressmaker you need to know both. After you cut out the flat pattern, then you have to sew it up into the muslin and then you have to be able to tweak the muslin so it will fit.
Usually most of us do that on our own bodies. And even though I have a mannequin, I still like to do that because I want to move in it in my way so I can feel if it's comfy or not for the movements I like to make. But I can only do so much on my body and that's where my mannequin comes in. I can pull, lift, tug, droop, shift the fabric around till I get it so it hangs really well.
 And it all starts at the shoulders. I've been glued to Instagram Reels lately on bespoke tailoring (I have no life 😁) and it's really fun for
me. One of the most recent ones is talking about how important the shoulder is. Yes, it's in Korean. No, I don't know Korean, but I do know Google Translator (detect language). The translation for this is: “The impression of a suit is determined by the shoulders.” Please pay attention to the shoulder line, sleeve line, and lapel design." And it all starts at the shoulders. I've been glued to Instagram Reels lately on bespoke tailoring (I have no life 😁) and it's really fun for
me. One of the most recent ones is talking about how important the shoulder is. Yes, it's in Korean. No, I don't know Korean, but I do know Google Translator (detect language). The translation for this is: “The impression of a suit is determined by the shoulders.” Please pay attention to the shoulder line, sleeve line, and lapel design."
Click on the photo to see a reel. Check out some of the other videos from this profile cause they are a blast.
The point here is that watching them pinch out here, pinch out there, in places that you might not have even known were places, can give you valuable information about what you "didn't even think you could do that!" Men's tailoring hasn't lost the fine art of fitting and complementing any figure. BTW, on this particular profile (@hespokesuit_official) are some really interested "big" fitting clients - especially pants. Some of you die-hard woven pants fans, will really love this.
I'm thinking of lining a bunch of these up and going through and critiquing them for our Zoom this month - what do you think? We could talk about what they're doing? Why they're doing it this or that way? What's really fabulous to watch? What's a real mess? How they fix messes? It might be fun, because the goals here are what we seek as goals. Only we ladies don't have nearly the mentoring for great fit and comfy fit, that
men do. Grrrrrr!!! LMK what you think about this idea.
The message this week is this:
I'm giving you permission to try things that you didn't know you could. Lots of times you all are right on track and you simply need me to say, "Go for it!"
So GO FOR IT!!!!! You have my full permission! Believe me - if you're off track I'll let you know!

The SewingArtistry Resource Library is designed to contain information to not only make your sewing better, but to aid you in fit and flattery of your shape, size and style. Check it out.
On the Blog
|
|
|
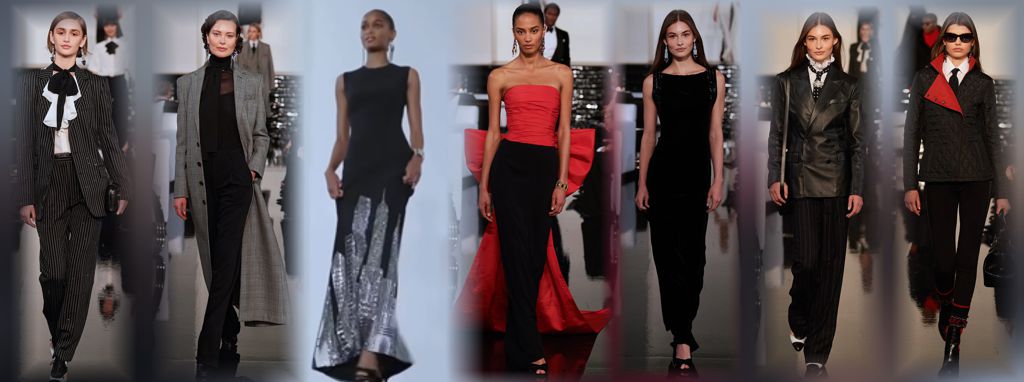
It's worth the time to look at these styles, particularly today as there is a group that wants to look...
|
|
|
|
This is the way fashion used to be - pretty, flattering and I can't wait to make some of ...
|
|
|
|
The other day I was doing the laundry and suddenly my machine wasn't spinning, thus wasn't washing. It was making...
|

To view in browser (so all images can be seen) or past emails or in your browser click here.
NOTE: Some email clients, software and web sites, do not allow pictures because they can contain nasty worms and viruses - ICK! So they will by default block you from seeing the pictures. This is a security measure from your email. I can't change that cause that means I would have to get inside your computer and mess with your security which you don't want! So you can do two things: 1.) you can disable your image blocker and that will
depend upon your software. You can Google it to see how to do that for your specific email. 2.) You can view it in your browser which is equipped to handle the nasties that might be in pictures. To do that you can click here to enjoy the full email with pictures!!
To talk about a sewing problem, a style quandary or size situation one on one with Claire, click here.
We respect your email privacy.
|
|
|
|