 |
November 12, 2021
Interfacing is like tires for your car. You can do without them but they never show. I mean when's the last time you had a cocktail party to show off your new tires? ...new drapes? ...new sofa? ...new dress? ....but certainly not tires.
And yet you can't run your car without them. You can make a garment without interfacing and some don't need it, but brother, if you skip or put the wrong interfacing in your garment, it shows, but not on the outside.
The problem is that the garment with the wrong interfacing or no interfacing hangs wrong, never closes right, certainly doesn't launder well, and like fitting the shoulders, once it's wrong, it doesn't get any better with age or even re-fitting.
The purpose of interfacing is to add a little body to only a certain part of the garment. Those parts are usually the endings -- endings like center front opening/closing, hem, collar, cuffs, and that sort of thing. Now few of us today interface the hems, however in classically, tailored jackets and suits, the hems were interfaced - hems of the skirts and jackets. The pants' hems were not interfaced.
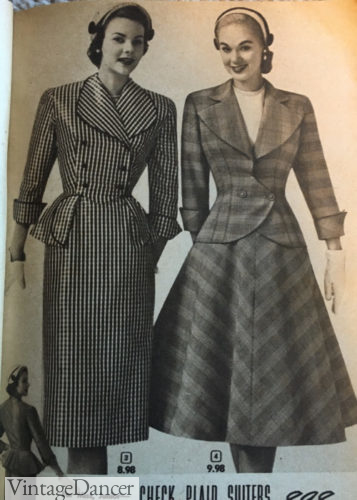
These skirts are the typical skirts that would require interfacing. The plaid skirt interfacing would be cut on the bias to offer a nice wavy look to the skirt.
This idea isn't so far-fetched today as horsehair braid is used to make an elegant hem that stands out in a swirling fashion that is a very dramatic look. As a matter of fact horsehair braid is a staple in most of my wedding and debutante gowns to make them look elegant and finished.
 
And that's the whole purpose of interfacing - is to create a finished ending. What makes interfacing particularly trendy right now is that as we move out of the Grunge Era, finished endings become more fashionable and there is nothing that finishes an edge better than interfacing.
But it's been a long time since we're really worked with interfacing, so as a little primer here are some really helpful guides to work through what works and what doesn't.
The first is Pellon man-made interfacing makes an inexpensive interfacing in several different types - bondable and non-bondable and in all sorts of weights. Pellon can be a nice fall-back or substitute, but it's usually not my first choice. The reason is that when Pellon bends, it doesn't roll, and it more often creases like paper. That isn't an attractive look - ever.
Heavy-Weight Interfacings
 For heavy weight garments, like tailored suits my staple is horsehair canvas interfacing. This is not bondable (unless you get this from Mood Fabrics), but I don't like to bond this type of interfacing. It's either pad-stitched in or laid in with tacking to stay in place. That sounds like a lot of work, but if you're working with this type
of interfacing on fine fabric, your garment is worth this extra time. For heavy weight garments, like tailored suits my staple is horsehair canvas interfacing. This is not bondable (unless you get this from Mood Fabrics), but I don't like to bond this type of interfacing. It's either pad-stitched in or laid in with tacking to stay in place. That sounds like a lot of work, but if you're working with this type
of interfacing on fine fabric, your garment is worth this extra time.
Horsehair canvas also rolls beautifully - particularly on the bias. I even use this in my ponte suit jackets and it makes them look positively Savile Row quality - only they are comfy and stretch! This will upscale any garment you use this in. Of course if you buy more (like by the bolt) it's cheaper than by the yard, but it's worth the expense and time.
Medium & Lightweight Interfacings
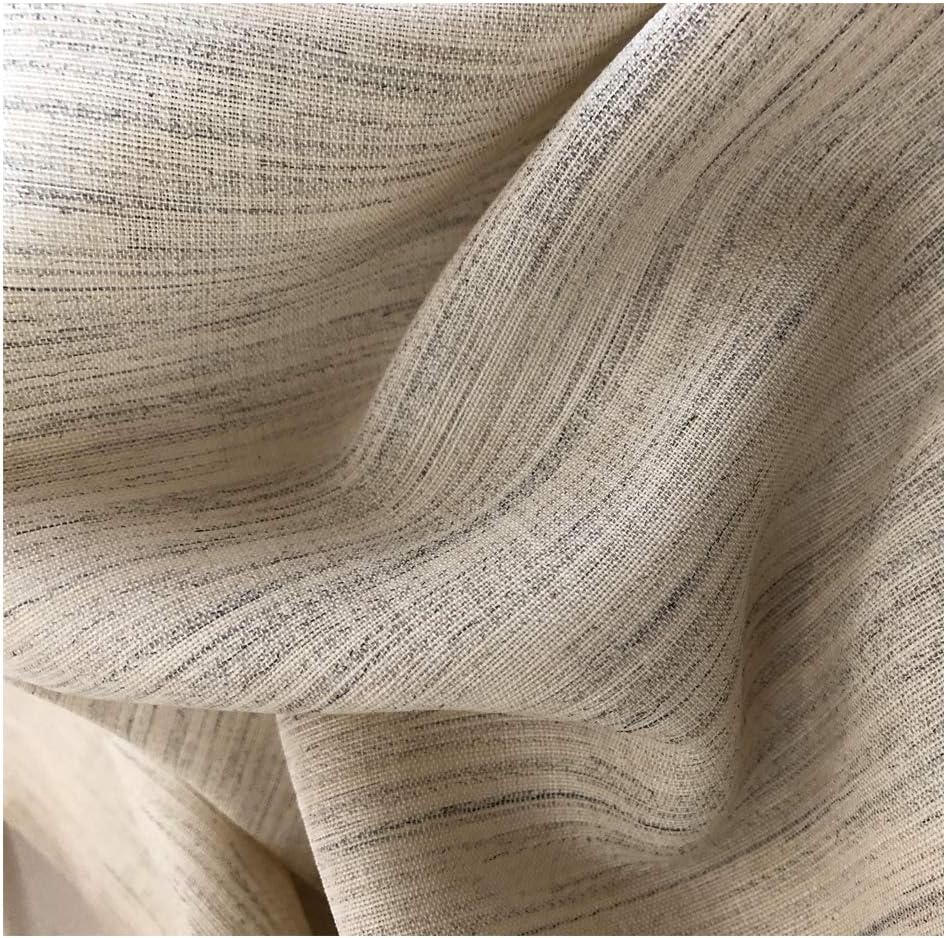
For medium weight and light weight fabrics, I use silk organza. If I need something a little heavier in weight than one layer, I will use, 2, 3, or even 4 layers to make the weight I like. I particularly love this in my silk blouses. The organza gives a great finished edge and if you press it softly the crease is very soft and gentle, or press it hard, and it's as crisp as a folded page. This is my go-to interfacing for silk, because the fusible will create dark dots
on the silk which will only show more the older the garment gets.
Silk organza also makes an excellent backing for some sheer garments or burnouts. Obviously I'm lining them or putting an elegant camisole or tank under them, but the organza maintains the "sheerness" in the garment that makes it look light, and the organza keeps it looking fresh and crisp.
Fusible for Tailored Shirts
Lest you think I sew-in everything, I don't. When I'm doing classic shirts and lovely collars with collarbands, I love using a woven fusible. This is almost like the fabric itself only it's fusible and makes an excellent crisp look for that tailored blouse.
Location for Interfacing
The classic locations are at all edges. During the 70s and 80s interfacing in hems waned and isn't so much done, even in custom-tailored garments, but at the closure of a garment, especially when the closure includes buttons and buttonholes, this requires interfacing.
The List:
Collars - (Nehru, Mandarin, stand-up, but not turtleneck or cowl collars)
Collarband - all - with or without collar
Front placket - inserted, fold-over and separate piece
Cuffs
Hems (in certain circumstances)
Lapels
Sleeve heads (in tailored jackets)
Back neck & upper sleeve (in tailored jackets)
Neck Facings
Sleeve Facings (or at least the seam edge with a bias cut interfacing strip)
Bottom of sleeve, especially 3/4 tailored, or with a vent "V" in the sleeve hem.
Anyplace that would need stability, structure or resistance to wear - like top of a pocket, a slit or vent that might receive extra stress.
You don't normally see interfacing in zippers, however if the fabric is particularly sheer or unstable, interfacing is a life-saver when putting in that zipper to keep it from wobbling and waving all over the place. Silk organza is particularly helpful here.
I also use silk organza on bound buttonholes, on one side cut on the bias as this aids in stability but allows for the ease to squeeze a tight button in that buttonhole without damaging the stitching in the buttonhole. The bias backing on the bound buttonhole makes for an elegant roll in the bound buttonhole that doesn't make it look like it was pressed in with a mangle or something! The more you sew, the more you realize that a hard/crisp edge isn't always as
desired as much as a softer, gentler pressed edge, which can have all the same crispness, but it's not ironed by some heavy machinery so as to ensure it's shape till it gets in the first wash and then the horrid assembly is revealed.
Backing
This can really stretch your stash like you wouldn't believe. I've actually take a very flimsily-woven fabric and backed it and it makes the most beautiful tailored jacket. Silk matka is a great example of this, as are bouclés. What's more, say you have a very flimsy, drapy silk crepe de chine, you can take that and back it in silk organza and have a very tailored top or tunic. You can even back the top part and not the bottom part so that the top
is tailored and structured and the bottom is flowing and flouncy. With the same fabric you have a tailored, yet flowing look, which you could never get with a structured fabric.
 So thinking that a light-weight fabric is very limited, is actually not correct, as you can back it in about any weight and it will do some pretty fabulous things. You can take a very sheer chiffon and cut it in circular ruffles, and with organza backing (with fishing line at the edge) and the circular ruffles will be sheer yet stand out and look as
structured as you want. So thinking that a light-weight fabric is very limited, is actually not correct, as you can back it in about any weight and it will do some pretty fabulous things. You can take a very sheer chiffon and cut it in circular ruffles, and with organza backing (with fishing line at the edge) and the circular ruffles will be sheer yet stand out and look as
structured as you want.
It's actually the other way around, because a sheer fabric can be anything while a structured fabric can't ever be sheer or light-weight!
 One of the ways we can tell what fashion holds in store for us is the hot trends from the last phase, are going to be the exact opposite of the new trends and finished edges is up there at the top. One of the ways we can tell what fashion holds in store for us is the hot trends from the last phase, are going to be the exact opposite of the new trends and finished edges is up there at the top.
Interfacing is going to take on a whole new look with more finished edges and a more polished look. These kinds of details are becoming more fashionable it garments, and make them as classic as possible. And the more classic the more they last.

This is the quintessential toolbox for the wannabe designer, and you don't even have to draw to use them. All you have to do is trace. That may sound just a little too far-fetched, but believe me, not all designers can draw, and most of them do not sew. So you are one up on most designers.
This package includes a lot:

Elements & Principles of Design w/Color

Proportion (Divine and Rule of Thirds) and Apex Point Fitting
and something new:
 Sketching - taking the idea to sketch, to pattern to garment and yes, you can do that. It's not that hard. There are a lot of steps, but this is the final part of the whole package of creating something especially for yourself. Sketching - taking the idea to sketch, to pattern to garment and yes, you can do that. It's not that hard. There are a lot of steps, but this is the final part of the whole package of creating something especially for yourself.
You know all those pictures on Pinterest or pinned in your studio or on your bathroom mirror?...those ones you know you would look smashing in if...1.) you could find the right pattern, 2.) you might be able to find it in RTW, but to fit you would be a problem or 3.) you've always wanted to create a look or certain collar or fabulous sleeve or some other detail and never knew how. Here's how to do that.
This does require that you have your core pattern up and running. That's what the whole pattern will be based on and it is what makes all this work so well. Whereas commercial pattern makers and designers have to go through 5 to 8 iterations to get it right, with your core pattern, we already know it works, and what we're doing is copying that to make the style you want.
If you already have only one of the above, then you have the opportunity here to bring your toolbox up to date by acquiring the only what you need at a discounted price. The Sketching Resource is the only one that's new that no one has before this month.
At the same time if you want the whole kit and caboodle, it's at an even greater discount than normal. Here's everything with the whole kit and caboodle at the bottom!
Enjoy!
Elements & Principles of Design with Color Primer - This is what art and design students learn in art school. The only difference between them and you is that they have the time to play around with them. But we can do the same, albeit a little less time.
Fitting with Proportion and Figure-Flattering Tools
(This one comes in two parts)
Sketching - From Idea to Garment
The Design Toolbox - All Three Resources above in one download at a terrific price.
Once this special is over, the Sketching will go into both the Proportion and Elements & Principles (it's already in the Toolbox), at regular pricing.
On the Blog
From the time I started my design company, I was sketching designs for clients. It was the only way that ...
|
It's fascinating to listen to this discussion of How Much Clothing Do I Really Need? for me because I don't ...
|
What has happened to fashion? There was a day when well-dressed and even not-so-wealthy women looked to the latest in ...
|

View past emails or in your browser click here.
To talk about a sewing problem, a style quandary or size situation one on one with Claire, click here.
We respect your email privacy.
|
|
|
|


